pinball machine build log
work in progress...
These posts are new to old, so to start at the beginning of my adventure scroll to the bottom.
07.08.2022
07.07.2022
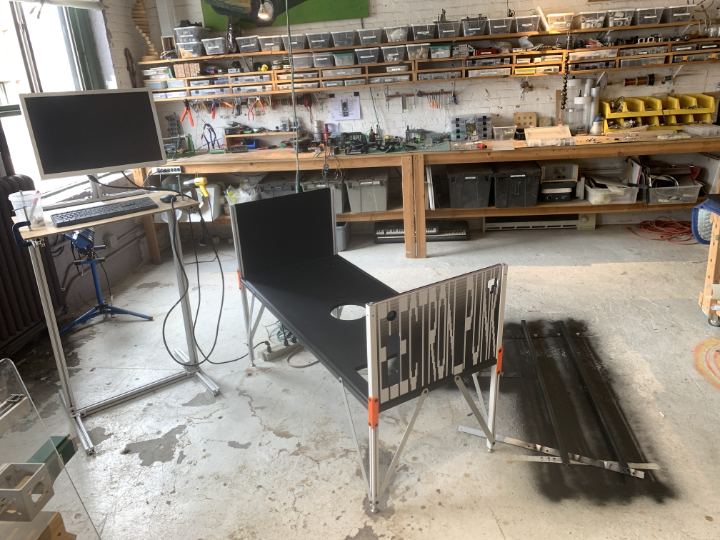
I disassembled the machine into seperate parts so I could paint.
06.04.2022
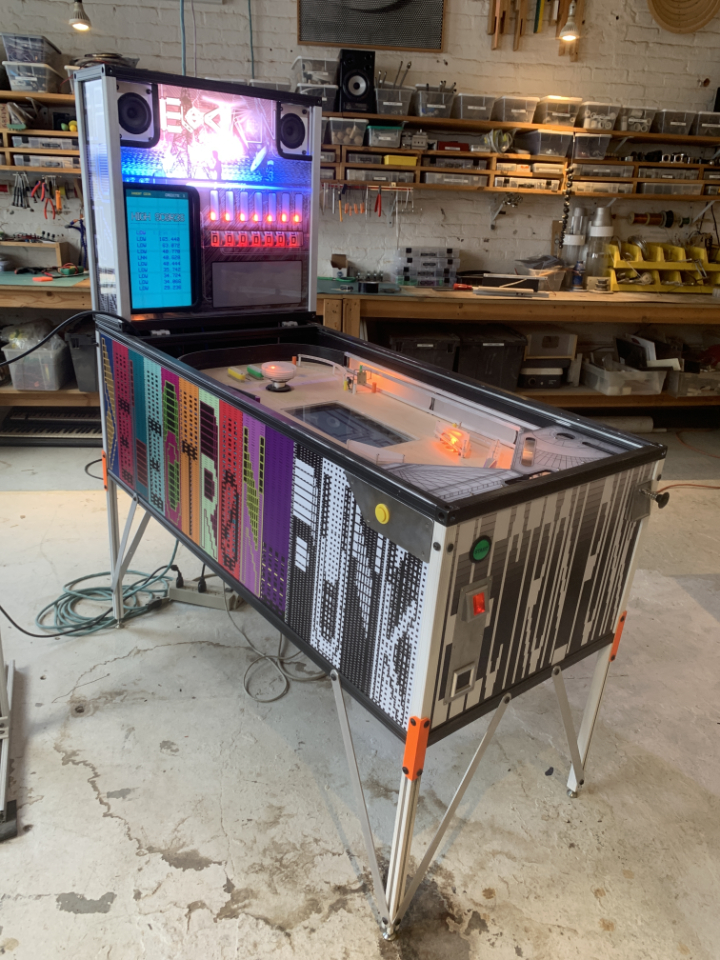
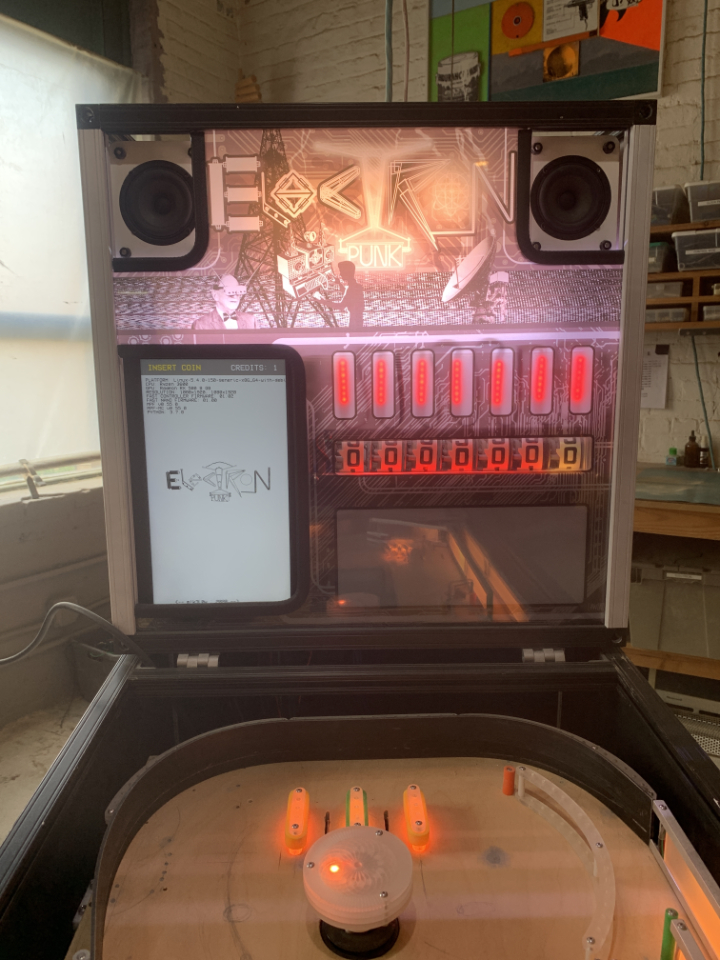
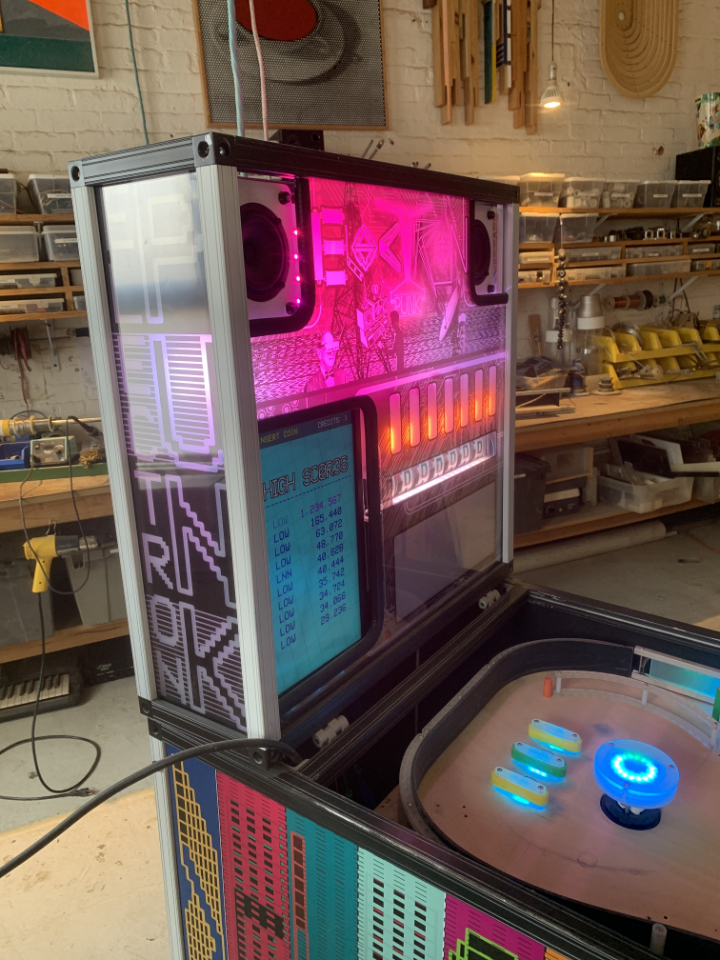
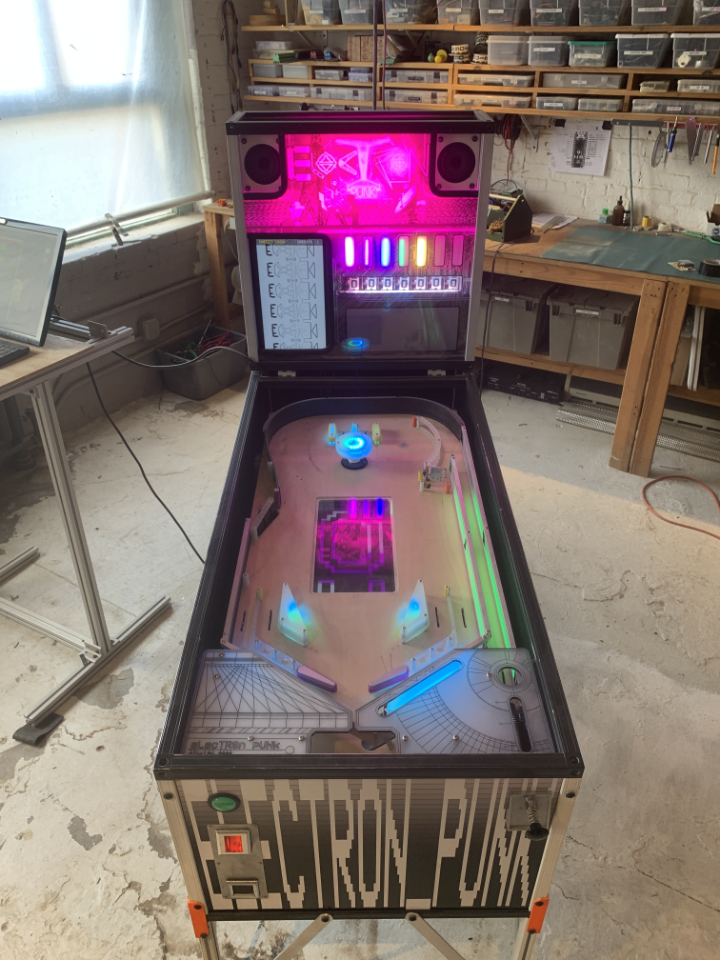
All the vinyls and backglass installed with transparencies I had printed. Still have to work on the playfield art and lamp placement.
I redesigned the artwork from the oringal renders.
This shows how I laser cut a large portion of the playfield parts.
04.17.2022
02.23.2022
cabinet render
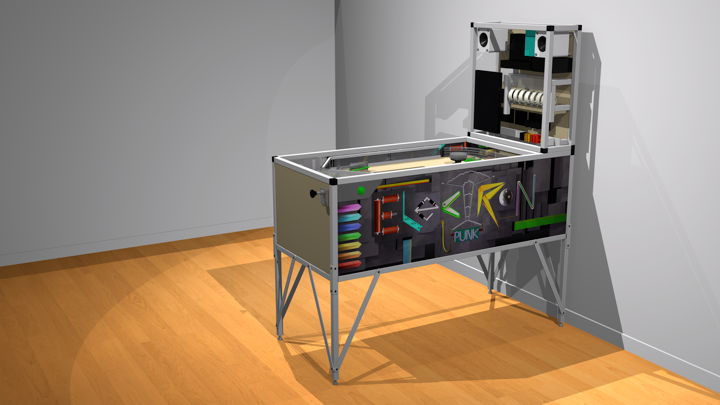
I rendered the machine with side art. Still working on the art for the backglass and front...
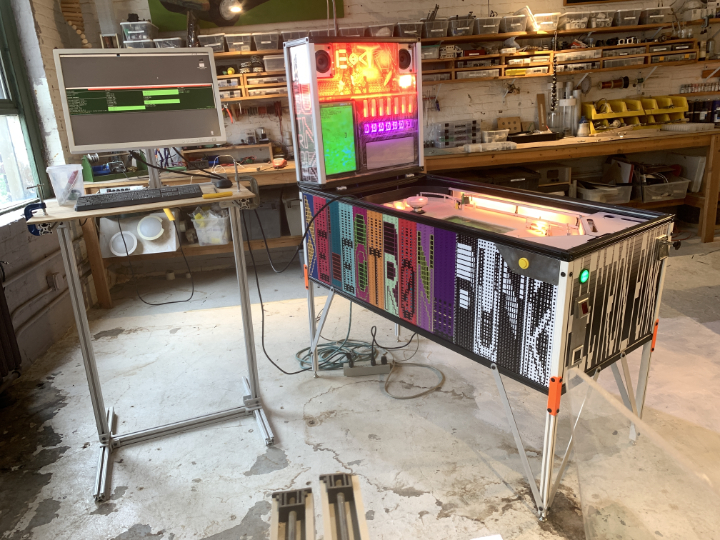
The cabinet has gone through a couple iterations in terms of its art and theme, but I think I have finally settled on calling it "ElectronPUNK".
backbox overhaul
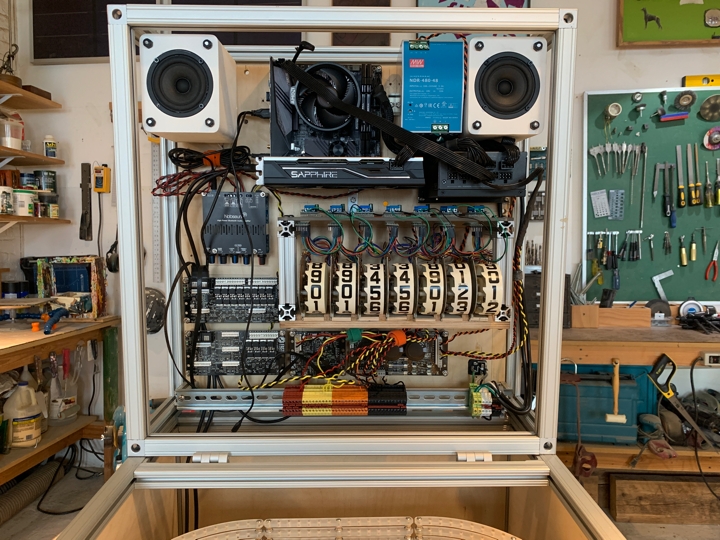
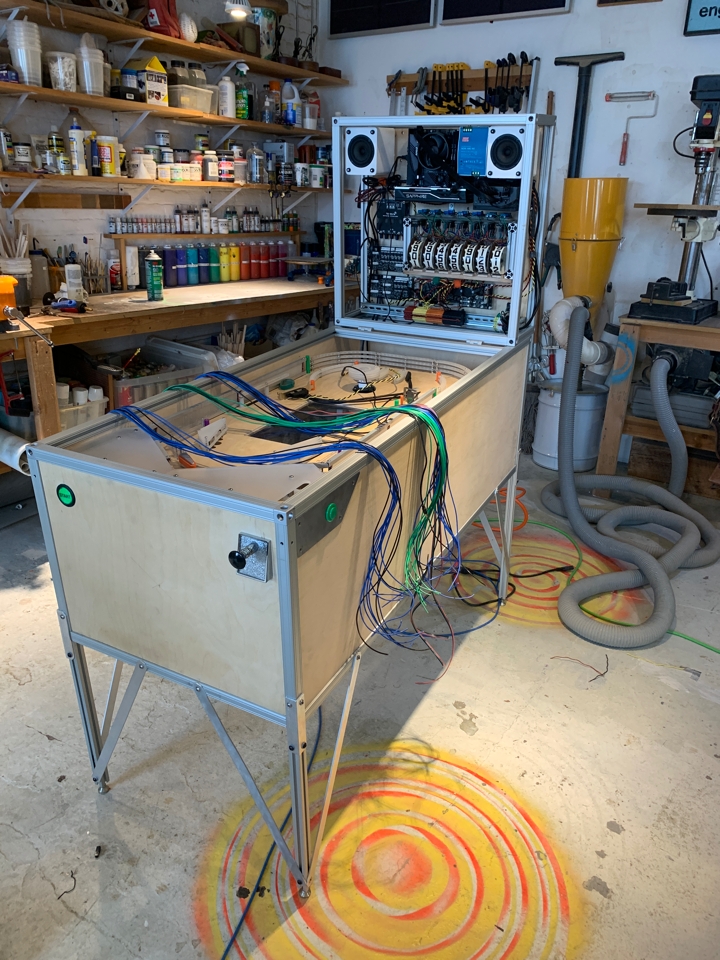
I did a full overhaul of the backbox. I decided to put everything I could inside the backbox. I initially had the motherboard and mosfet boards in the bottom cabinet but overtime I did not like lifting the playfield and bending over into the cabinet. The backbox is stuffed too its gills, so I just I have to make sure the airflow is good through the head unit. All the components in the backbox need to be serviceable so I had to take this into consideration when laying it out. It is definitely tight in there and every inch counts. The wiring will probably be need to be assessed again. The backbox does hinge down for travel and I think I am going to need some sort of locking mechanism or latch. I don't like where the audio amplifier is currently, so I need to figure a new position for it. I want the volume controls more accessible from the exterior.
wire harnessing
music to my ears
I added speakers, sound effects and music to the machine finally! My friend is a musician so the music tracks are his creation.
score reel controller with LEDs
Now I think I want parallel processing on the score reels... I do have a scheme for this which means pulling out the multiplexers and replacing each score reel coil control with its own microcontroller. So 8 Arduino nanos, one per mosfet/coil, and one master, I2C bussed. I don't know why I didn't think of the earlier? There are 11 digital pins on the nano so I can do it.
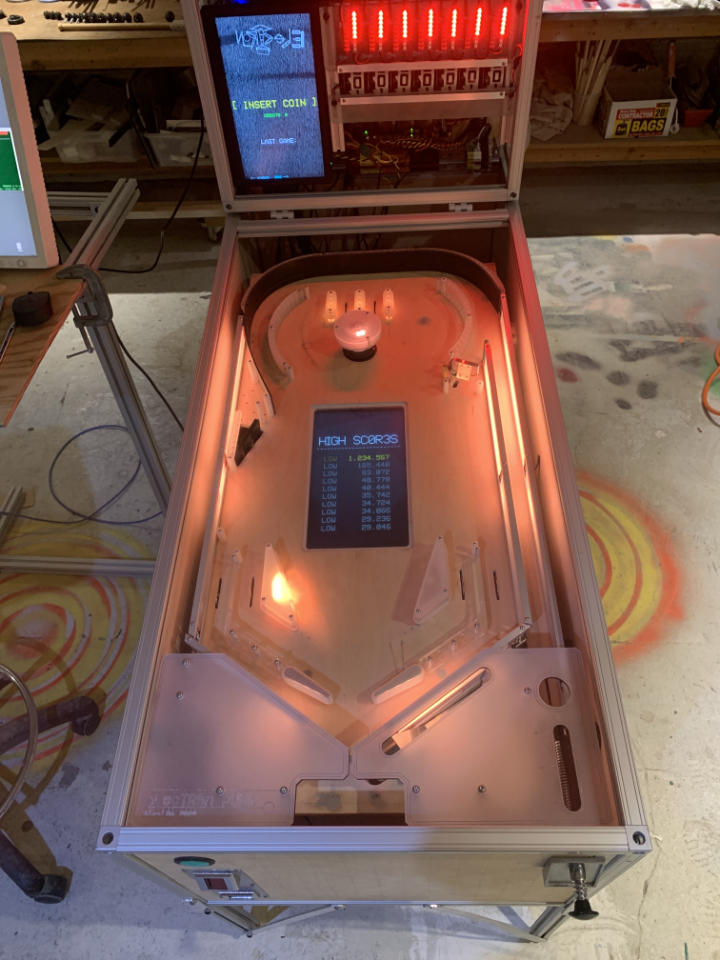
state of the machine
score reel controller integration with MPF
score reel controller with multiplexers
I got the mulitplexers hooked up to the Arduino via I2C. Now I can read the states of all the reels with the Arduino.
I am using here the Noyito Multiplexer which is based on the high speed I2C interface MCP23017 16-Bit I/O Expander with serial interface.
score reel controller mockup
Working out the score reel controller with an Arduino. I am in the midst of setting up the multiplexers in order to read the states of all the commutated switches on the mechanical reel. I got some better MOSFET controllers so I am running the coils at 48 VDC.
I should include some pictures of a dissambled reel here...
integration!
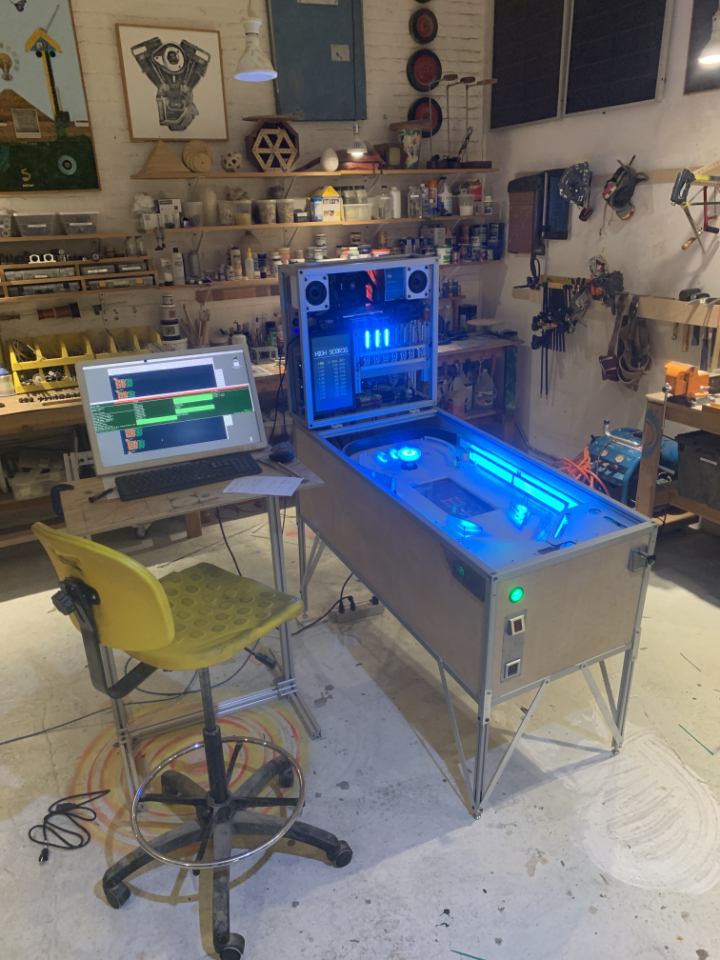
A lot of parts coming together. I got the FAST Pinball hardware installed in the cabinet and integrated with Mission Pinball Framework.
I need to include the computer spec here...
I also added a 1920 x 1080 video monitor in the backbox.
test computer
The computer I started with was an Intel NUC running Linux Mint with Mission Pinball Framework installed.
versions???
Mission Pinball Framework
Installing and getting MPF up and running had its ups and downs. I don't remember it being frustrating but I knew I had to just climb the learning curve and progress slowly.
OS
I decided to go with Linux Mint after testing a bunch of different distros. Linux Mint is Ubuntu based, which is Debian, which works well with MPF. The installation of Linux Mint went the smoothest for me, as it recognized all my hardware flawlessy. Linux Mint is also available in a couple editions with different desktop environments. I always liked MATE so I went with that.
FAST Hardware
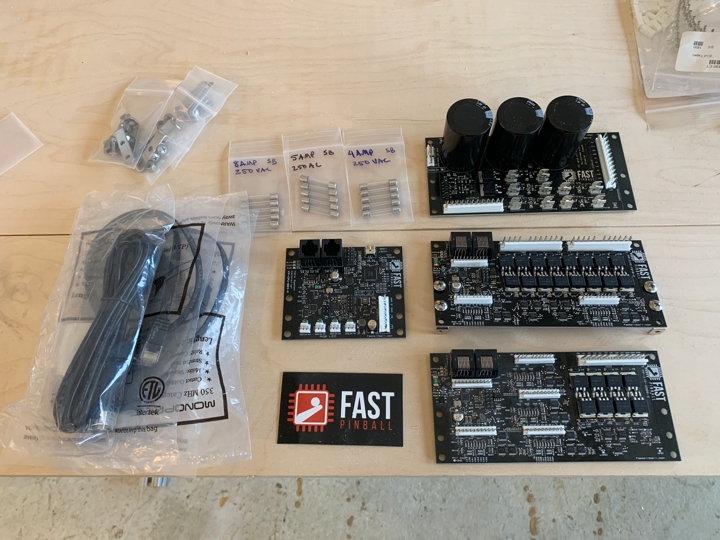
Here is all the hardware I ordered from FAST Pinball.
FAST 1616
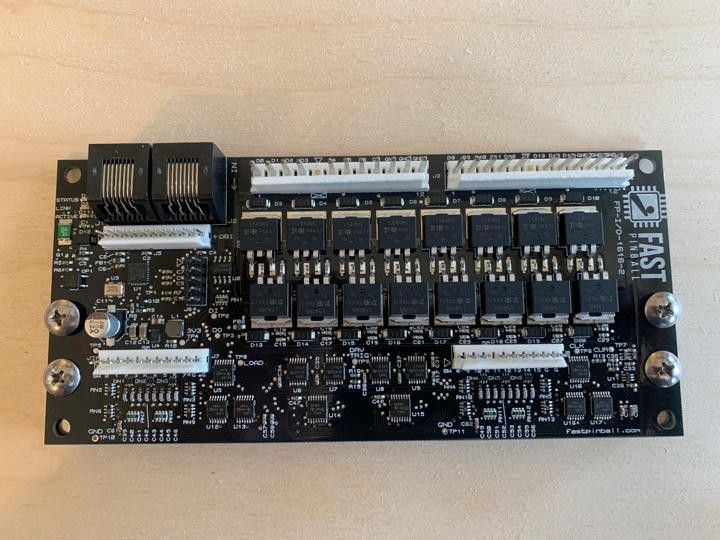
16 switches, 16 mosfets. The larger pin headers on top are for the mosfets, and the smaller pin headers are for an optional daughter board and the switches.
FAST 3208

32 switches, 8 mosfets.
FAST Nano
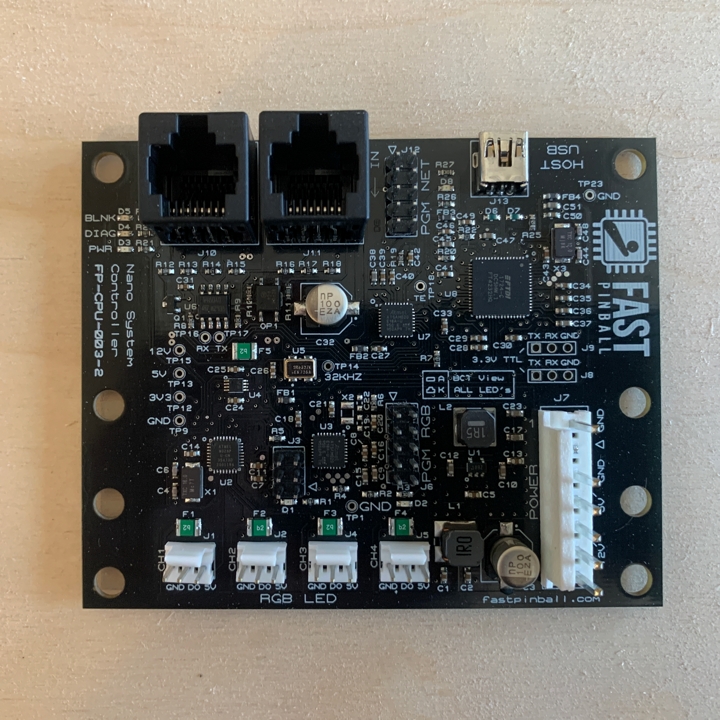
4 channels of RGB goodness. This board plugs into the main computer via USB.
FAST Fuse/Filter board
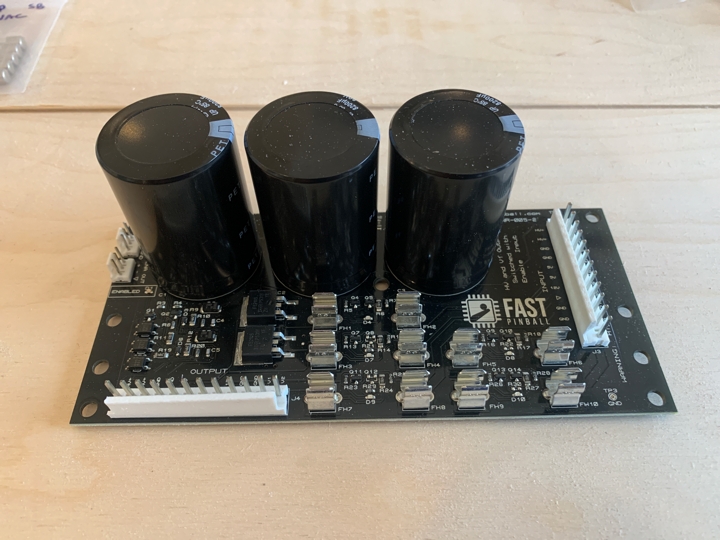
mmmmm. look at those caps..
paneling installed...
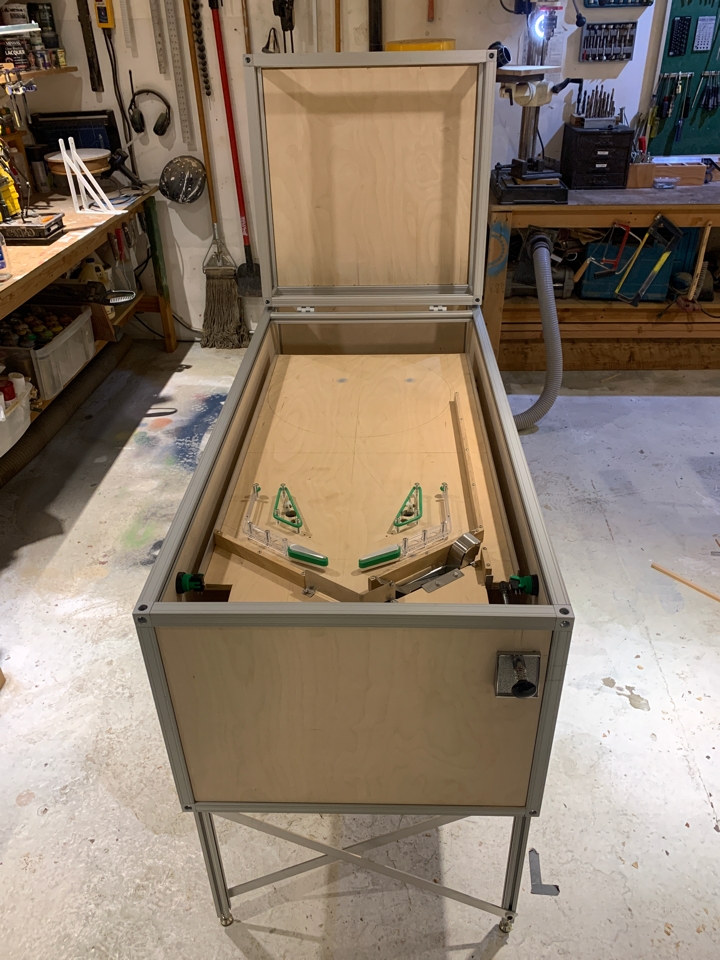
All the panels are removable and I can swap them out if I make a mistake or need to put a panel flat on the CNC machine to route holes if need be.
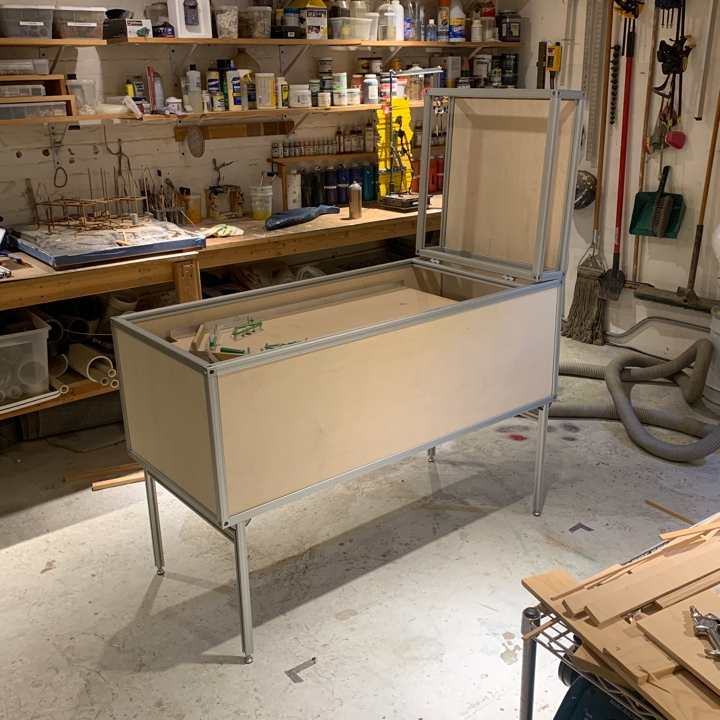
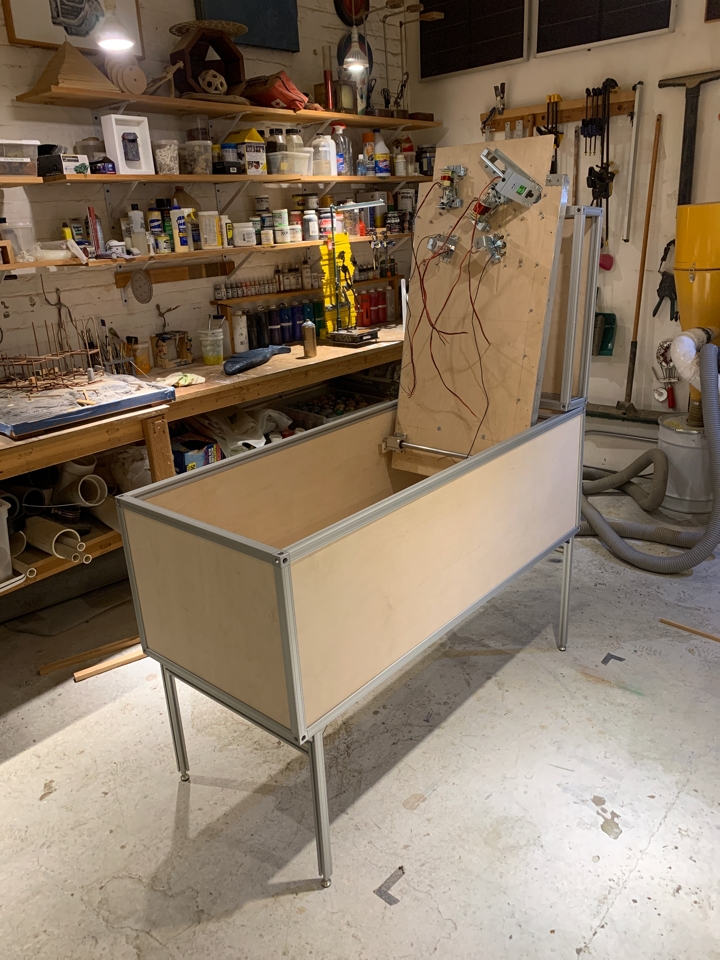
cabinet / backbox frame-up
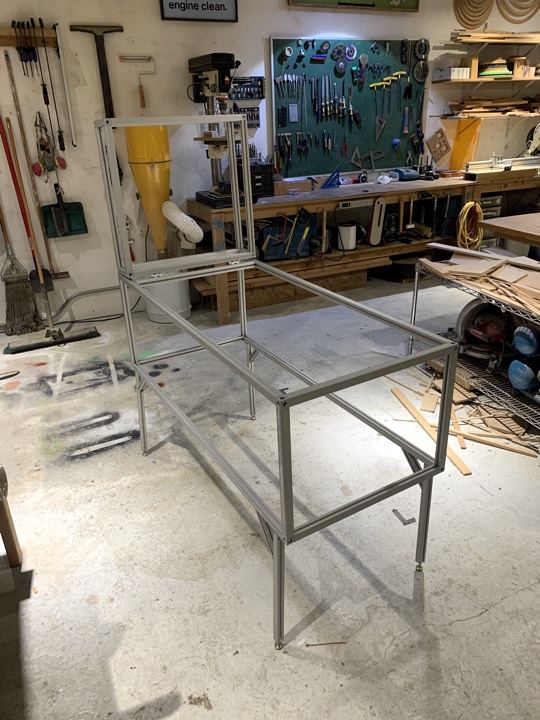
I decided to take a non-traditional approach to the construction of the cabinet. My intial design goal was to create a pinball machine prototype which I could easily disassemble and swap out parts as I saw necessary. I created a frame out of 80/20 structural aluminum in which I could swap the panels. It does increase the cost of the initial build out but it is more advantageous for me in a prototyping stage. The exterior frame will frame the art panels nicely and also act as protection. The leg system I came up may need some work, as I took a different direction there as well.
I should include some pics of renders of the 3d model I did in Rhino...
playfield mockup
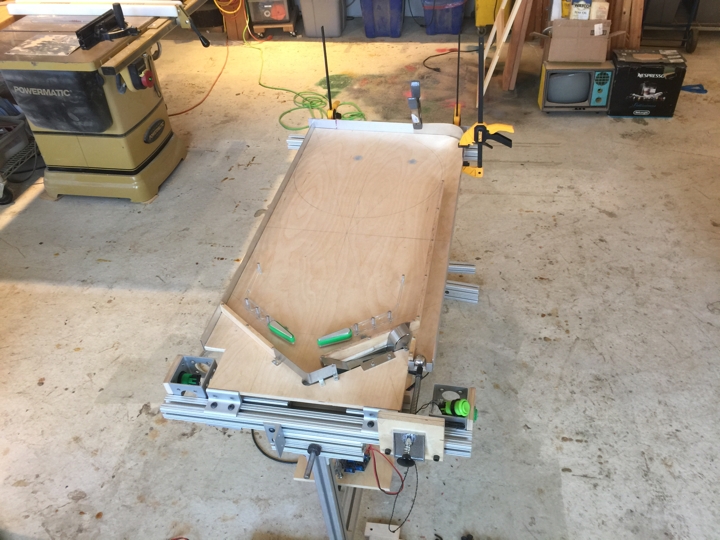
Figuring out how to deal with this playfield. I had seen people online building rotisseries, so they could easily turn the playfield and work on either side, so I built one. After using it for a while, I found I didn't like working in that manner, especially in a prototyping stage. I eventually ended up with a bottom stand that hinges rather than deal with the rotisserie.
I added arcade micro-switch buttons to trigger the coils and updated the arduino code for control. I like the feel of micro-switches much more than leaf contacts.
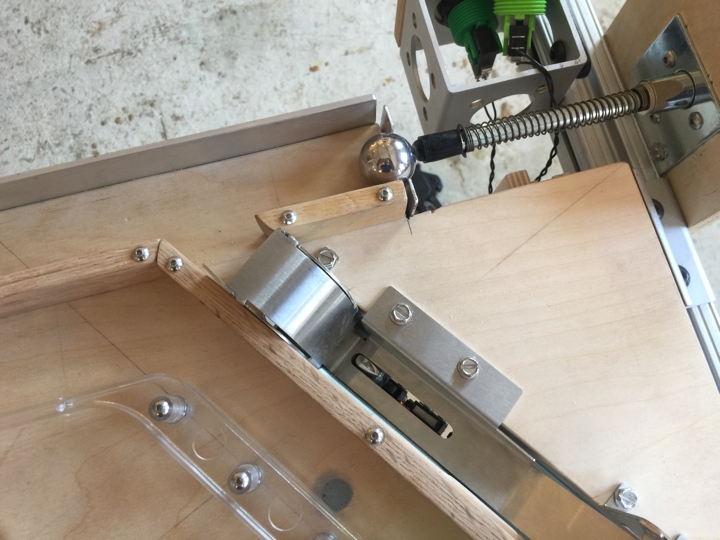
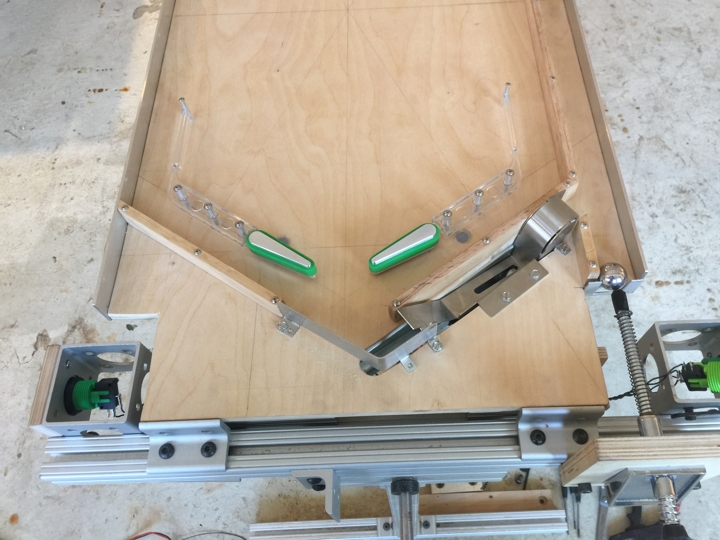
Here is the ball return. Getting the spacing with the plunger here is somewhat unintuitive. I made sure the plunger hits more towards the top of the ball so the ball does not backspin.
initial flipper mockup
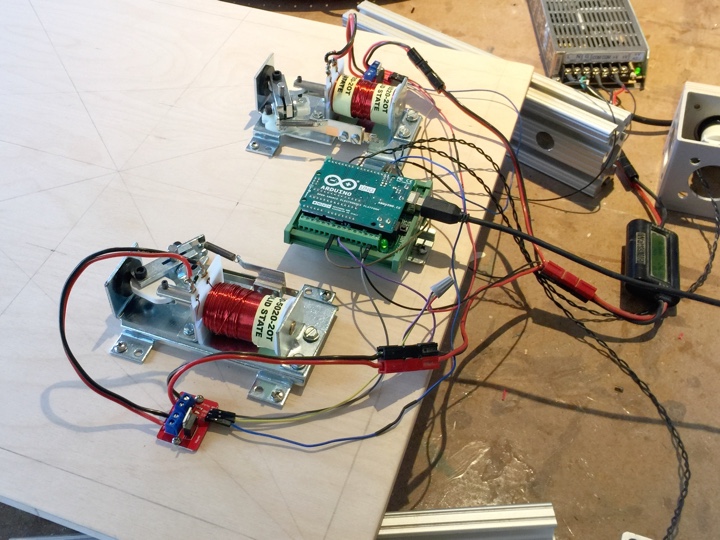
I made a flipper mockup with two mosfets and an Arduino. I ran the flippers in this mockup at a low voltage 24 VDC. The mosfets I was using weren't rated any higher, so I was being conservative. I used this mockup to check for spacing and hole patterns to align the flippers. It also was test on a half inch piece of baltic birch with the hardware.
I should state here what coils I am using.
Since I was using mosfets to control the coils, I setup a simple arduino program to control the power using PWM.
Once I got all the power and the mosfets firing I was ready to start hooking up some buttons.