3.24.2017 mill overview
I have been asked a lot of questions about the linear slides I use in my setup, so I went ahead and made this video to show a little bit about the machine.
mill operation
This video will get loud...
last update: 2012
I have since swapped out stepper motors for more powerful ones, slightly redesigned the x-axis and added a cable carrier, but alas I still have not documented it. This machine has been in service for three years and it has given me little trouble, however I have noted to myself certain improvements that I would like to implement.
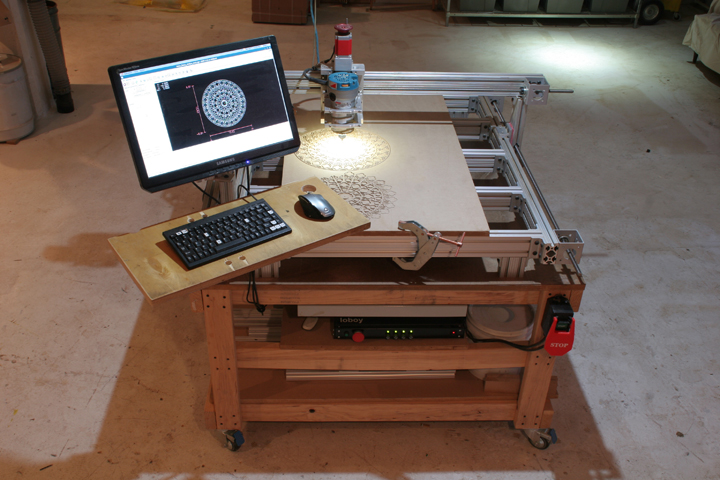
I constructed this gantry router mill from 80/20 aluminum extrusion. My design intentions here were to keep things as simple as possible. I wanted a machine that I could simply bolt together and expand as needed.
The entire machine has a footprint of 4' x 4'. The cutting area is a little over 30" x 30". The mill was designed to use standard 4' lengths of 3" 15 series extrusion. I kept the entire structure of the machine purely 80/20 parts, except for the 1/2"-10 lead screws and the Z-axis. There are only 4 different types of 80/20 parts on this machine, the 3" extrusions, the "L" brackets, the custom stepper mounts, and the 80/20 linear slides.
I run this mill with a jog speed of 300 inches per minute. I run a cutting feed rate of around 15-25 inches per minute depending on the material and bit. I primarily use this machine to mill hard woods, baltic birch, as well as some nylon, polycarbonate, and acrylic plastics.

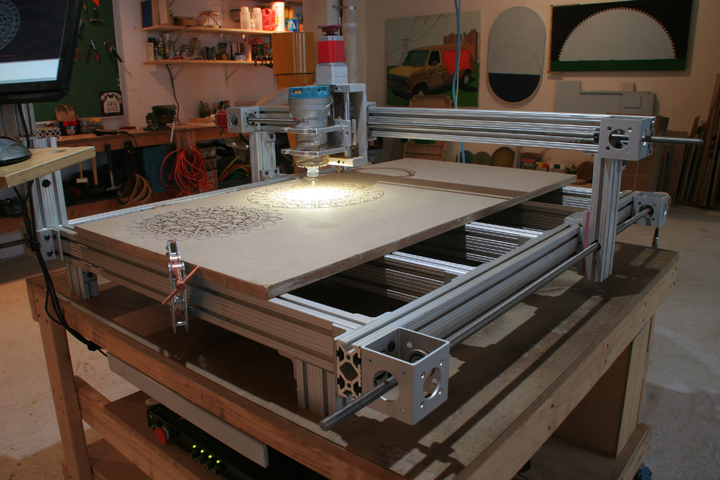
I kept the cutting bed as struts to allow for a variety of clamping setups. It is very simple to add a fence to this setup as well.
The router's power is controlled by an large external kick box switch for safety and ease of use.
I installed the joystick package as well as QJoyPad on the Ubuntu control box so I could use the wireless USB Xbox360 controller to move the machine. QJoyPad is used to map the buttons on the controller to keys on the keyboard.
X and Z axis
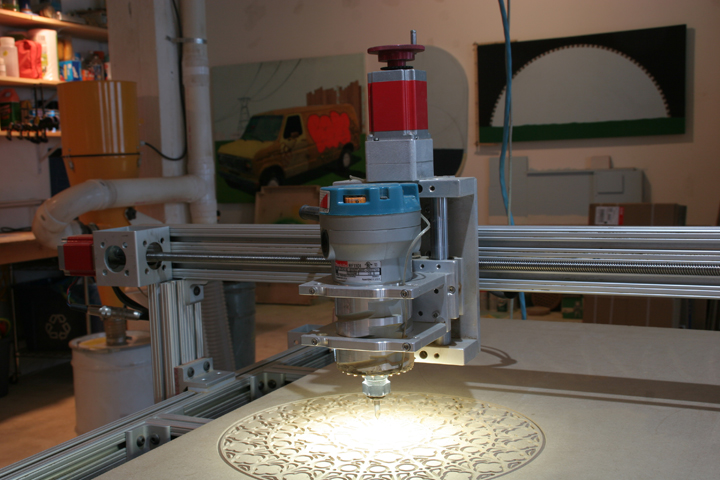
The the Z-axis and spindle mount for the router was purchased from K2CNC.
dual drive Y-axis
For the Y-axis I ran two lead screws with two stepper motors wired in parallel. This is a solid setup. I had previously run a center fed lead screw with a single stepper and it was racking (twisting at the center) too much. The design of this machine proved versatile enough to try both setups.
linear bearings (slides)
I decided to go ahead and experiment using the double flange linear bearings that 80/20 offers. These have proven to be a nice cost effective solution to other linear bearings and linear support shafts, and also reduces the number of parts and complexity. These linear slides are somewhat fickle to setup, but once the slide inserts are appropriately shimmed on the inside, the machine is very smooth.
These slides are not designed to be side loaded the way I have them set up, but it works for me and has proven sufficient. You must be patient with these linear slides, I had to assemble and disassemble them multiple times until the shimming was just right. Warning: You will get annoyed with these.
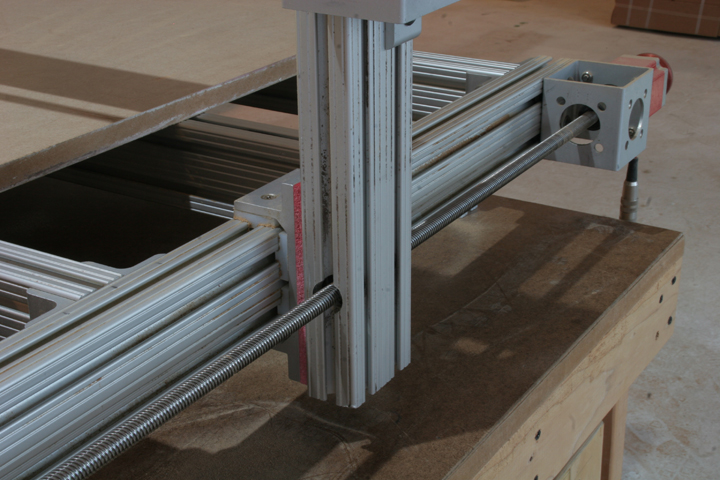
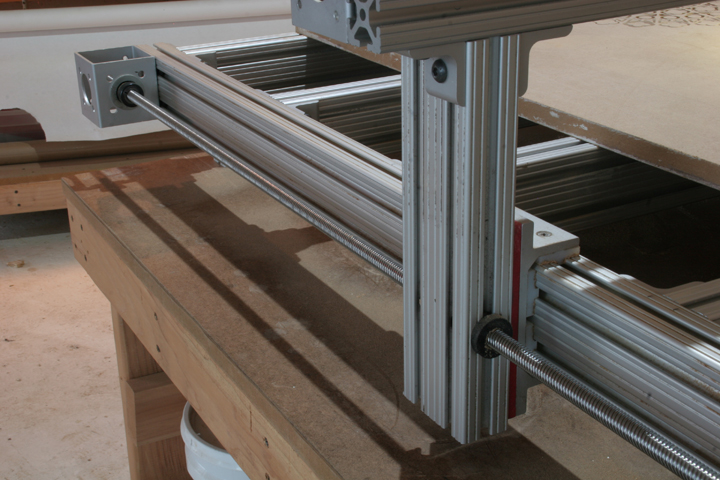
A piece of red 1/4" thick fiberglass was used to bump out the linear slides so everything would line up on center. A 7/8" bore was drilled and tapped to fit the plastic lead nut.
For the lead screw ends, I push fit a flanged ball bearing into the mount. I used a clamping shaft collar for the thrust action of the lead screw.
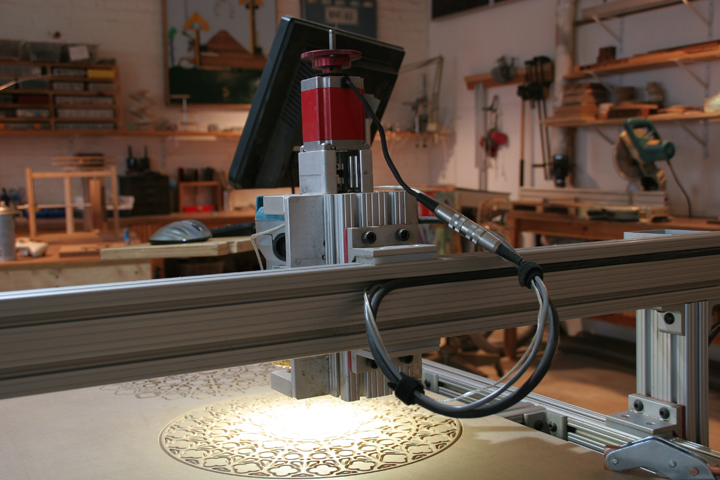
stepper motors
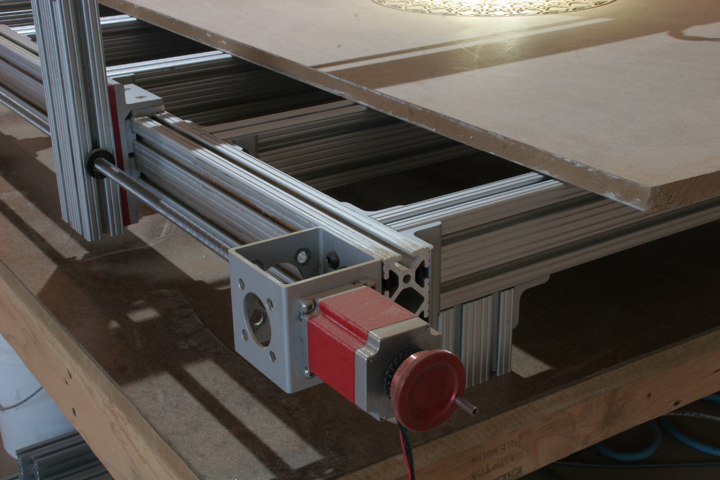
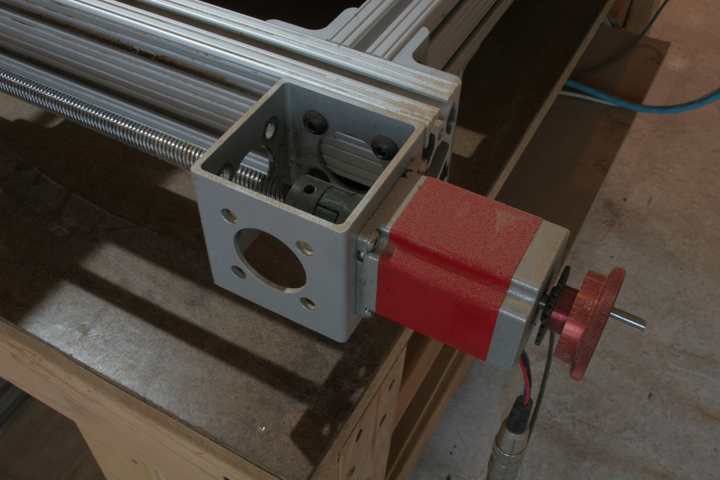
For the stepper motor mounts I had 80/20inc machine a NEMA 23 bolt hole pattern and 3" extrusion bolt hole pattern into a blank extrusion they sell.
I used four wire DIN connectors on the steppers and created some male / female cable assemblies
| frame: | Nema 23 |
| wiring: | 4 wire bipolar |
| step angle: | 1.8 degrees |
| rated current: | 3 Amps |
| rated voltage: | 12-48 Volts |
| phase resistance: | 1 ohm |
| phase inductance: | 3.5 mH |
| holding torque: | 254.88 oz/in |
| detent torque: | 8.5 oz/in |
| rotor inertia: | 2.411 oz/in2 |
| motor weight: | 2.31 lbs. |
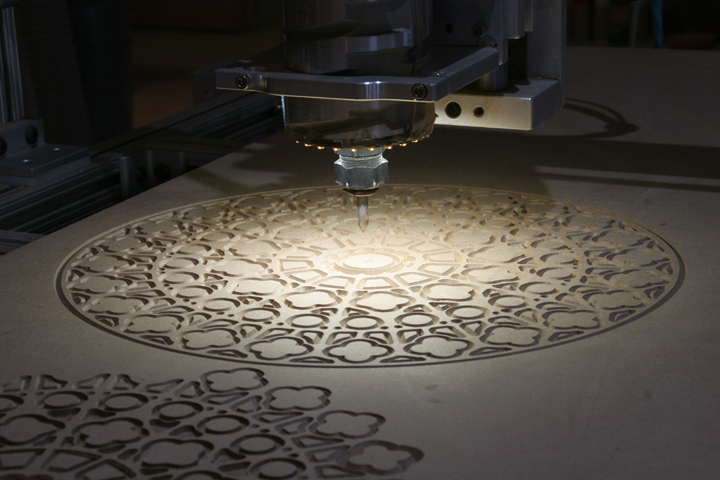
light
I hot glued a circular LED array to the bottom of the router so I could see the cutter better. Time will tell how long it will stay attached after the constant banging of a wrench to change the bit. I wired it directly to the power supply in my control box, so that when I boot the control box the light turns on.
The 80/20 allows for a variety of configurations, is easy to adjust, and is vastly expandable.
Fine adjustment is the key in a machine of this nature. A 1/32" of slop, a couple of degrees out of square, or over tightening in one place may cause unexpected consequences somewhere else in the machine.
I have found this to be very solid, stiff, and precise for a DIY machine, although working out the quirks took a while.
If you are thinking of building a gantry type mill, I highly recommend modeling it in a computer first. 80/20 part models and many other parts can be downloaded from 3dContentCentral.com. If this is your first build, I would also recommend starting small and experimenting with the mechanics first to get a feel for things, especially the torsional forces involved in such a machine. Another great resource to get your CNC blood pumping is CNCZone.
revamped Axis interface
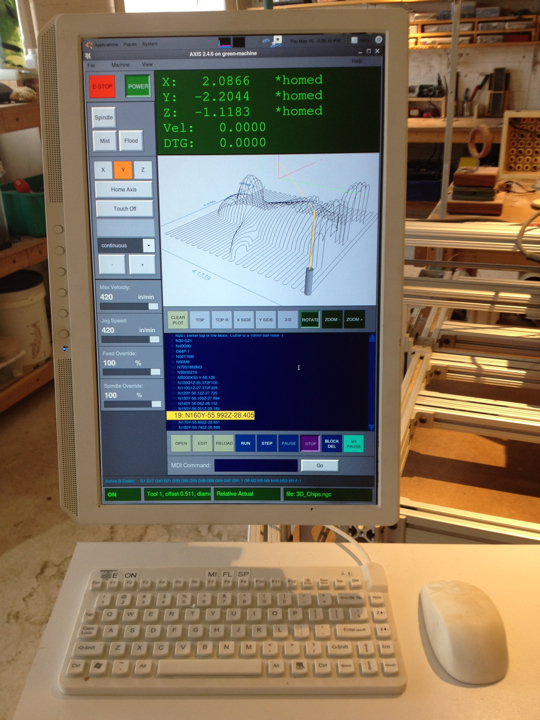
I completely overhauled the crufty old EMC2 Axis interface for a portrait mode monitor. I left justified all the machine controls, and kept the DRO, preview, and g-code readout to the right. The workflow is top to bottom. The overall interface is now easier to read and easier to use. I removed the old tabbing interface as well. Eventually I would like to implement a touchscreen, so all the buttons were sized appropriately.
If you wish to play with the code for Axis and change things for yourself, the files can be found at:
- /usr/share/axis/tcl/axis.tcl (this is the code responsible for drawing the interface)
- /usr/bin/axis (this is the main python script)
Be sure to backup a working copy before toying with the code. To edit these files you will have to use the terminal command "sudo gedit"...
changing live plotter preview colors in Axis
To change the live plotter preview colors in Axis you have to copy the contents of the file:
- /usr/share/doc/emc2/axis_light_background
into the file:
- ~user/.Xresources
then you have to merge it using:
- xrdb -merge .Xresources
I had trouble with the this because the file .Xresources is hidden and I had to create it. I had thought Axis would just read the file where it is was. If you use Axis remotely from a different machine, the default colors will be used instead, unless you do the same thing on the remote machine. Eventually I am going to hardcode this into Axis, like it should be.
display blanking issue
For a while I had this issue with the display blanking for unknown reasons. I had done all the usual things trying to stop the monitor from blanking, setting the Power Management display sleep to Never, and turning off the screen saver. This just did not solve the problem. Welcome to Linux. I then just deleted Gnome's screensaver, since all the screen savers were crap anyway. This didn't work. I then trolled tons of forums looking for some obscure answer, trying all sorts of wacky crap. I then finally stumbled upon something that actually worked permanently. I had to edit:
- /etc/gdm/Init/Default
and put in there near the top the following:
- xset s noblank
- xset s off
- xset dpms 0 0 0
- xset -dpms
To see what your current settings are for xset, in Terminal use:
- xset q
This worked for me.